Kostenlose Rückgabegarantie

How to Use a Thermal Camera to Find Hidden Problems (Beginner Guide)
If you're new to thermal imaging, a handheld thermal camera like the HANMATEK Ti240 can seem intimidating at first — but it's actually one of the easiest and most powerful tools for spotting hidden issues. Thermal cameras (also called infrared thermal imaging cameras) detect heat instead of light, turning invisible temperature differences into colorful images that reveal problems you can't see with your eyes.
This beginner-friendly guide walks you through the basics of how to use a thermal camera effectively — from setup to scanning and interpreting results. Whether you're checking your home for insulation gaps, inspecting electrical panels, or troubleshooting HVAC, you'll be finding issues quickly.
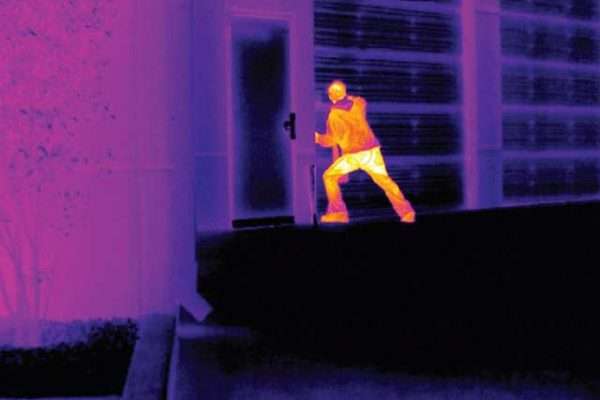
Here are step-by-step visuals showing beginners using a handheld thermal camera for the first time:


Step 1: Get Familiar with Your Thermal Camera (The Ti240 Basics)
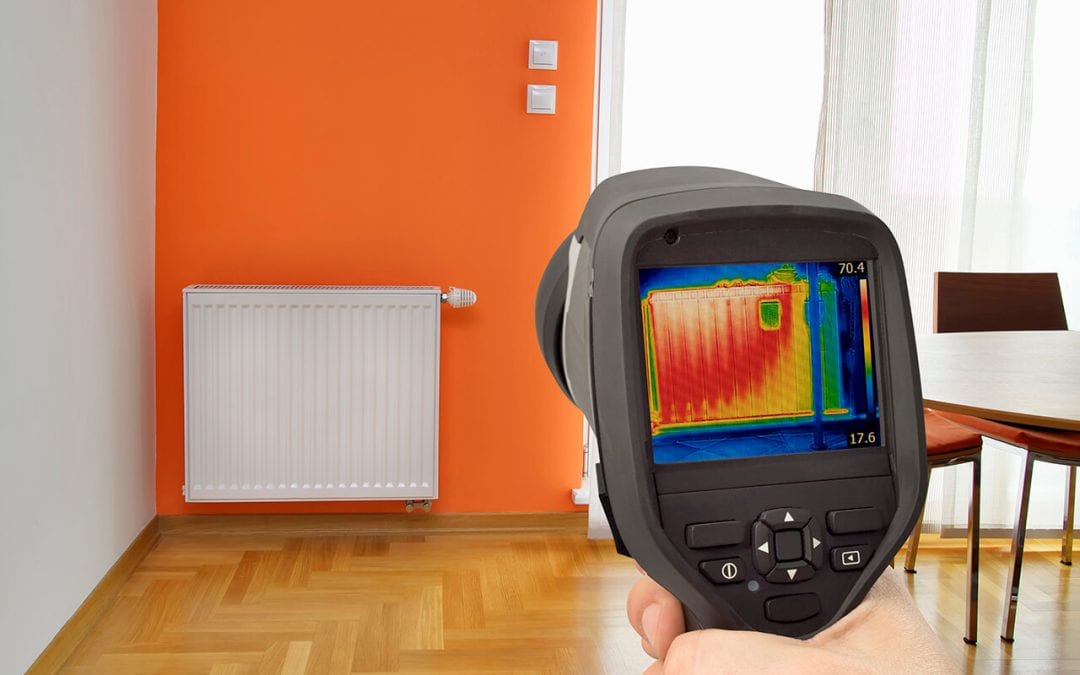
Power on your HANMATEK Ti240 (rechargeable battery lasts up to 9 hours). The 2.4-inch color screen displays a live thermal view right away.
Key beginner controls:
- Power / Menu button — Access settings like emissivity, temperature units (°C/°F), and alarms.
- Palette selector — Start with Iron Red (popular for electrical) or Rainbow (great for home inspections).
- Level & Span — Auto mode works best for beginners; it automatically adjusts contrast to show the most useful range.
Pro tip: The Ti240 has 6 color palettes — try them to see which makes problems pop the most clearly.
Examples of common thermal color palettes (Iron Red for electrical, Rainbow for building scans):

Step 2: Understand What You're Seeing (Hot = Bright, Cold = Dark)
Thermal images show temperature differences (Delta T):
- Hot areas appear brighter (white/yellow/red in Iron Red palette).
- Cold areas appear darker (blue/black).
- Normal room temperature surfaces appear mid-tone (green/blue).
The Ti240's 240×240 resolution gives you sharp, detailed images — much clearer than lower-res models.
Step 3: Scan Properly — Best Practices for Beginners
- Choose the right time — Scan when there's a good temperature difference (e.g., heat on in winter, AC in summer).
- Keep steady & scan slowly — Hold the camera ~3–6 feet away and move smoothly. The 25 Hz refresh rate makes the image smooth.
- Use auto mode first — Let the camera adjust contrast automatically.
- Look for patterns — Problems show as unusual hot/cold spots against the background.
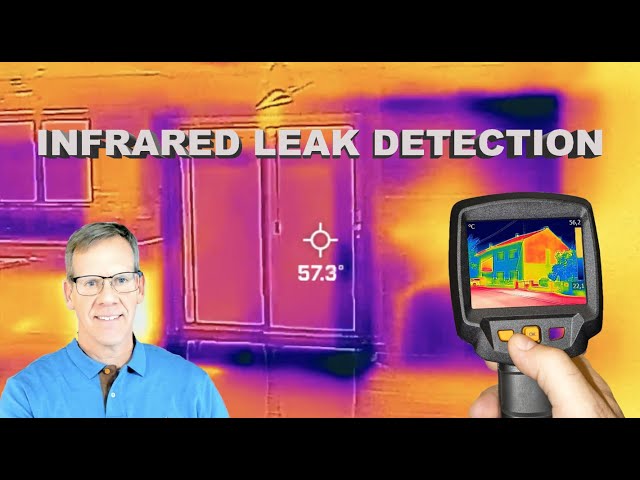
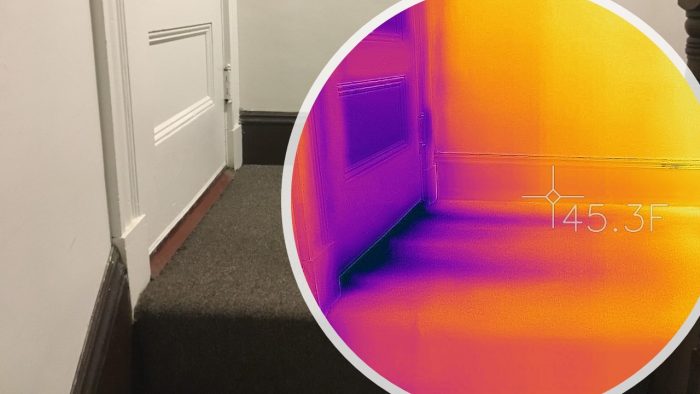
Real beginner inspection examples showing hot spots, leaks, and insulation issues:
Step 4: Common Beginner Finds & What They Mean
- Hot spots (bright yellow/red) → Electrical overload, poor connection, or overheating appliance.
- Cold spots (dark blue/black) → Missing insulation, air leaks around windows/doors, or water intrusion (wet materials stay cooler).
- Streaks or lines → Air leaks or duct problems in HVAC.
The Ti240's high/low temperature alarms beep and flash when something unusual appears — great for beginners.
Step 5: Save & Share Your Findings
Take photos/videos directly on the Ti240 (stores on 8GB SD card). Transfer to PC for reports using included software — perfect for home energy audits or sharing with contractors.
Ready to Start Finding Hidden Problems?
The HANMATEK Ti240 is designed to be beginner-friendly while delivering professional results with its high resolution, easy menus, and long battery life.
Get started today — grab the Ti240 and uncover issues you never knew existed: Buy HANMATEK Ti240 Thermal Camera
Explore more new tools: New Arrival HANMATEK Tools Collection
Thermal imaging is easier than you think — start scanning and see the difference!
Einen Kommentar hinterlassen