Free Returns Guarantee
Free & Easy Returns
Free & Easy Returns

Oscilloscope measurement of power supply ripple is one of the most critical tasks in electronics design and troubleshooting. Excessive ripple can cause circuit instability, noise in audio systems, errors in microcontrollers, and even damage sensitive components over time.
While a multimeter can show you average DC voltage, only an oscilloscope can reveal the actual AC ripple riding on top of that DC output. In this guide, we’ll walk through how to accurately measure power supply ripple using an oscilloscope — with practical tips and the recommended tool for the job.
Ripple is the small unwanted AC voltage fluctuation superimposed on the DC output of a power supply. Typical causes include insufficient filtering, poor regulator design, or aging capacitors.
Common acceptable ripple levels:
Exceeding these thresholds can introduce noise, reduce signal-to-noise ratio, or cause logic glitches and resets.
Fact 1: Multimeters Are Insufficient for Ripple Analysis Multimeters provide accurate average DC voltage readings but cannot capture dynamic AC fluctuations or noise. In real-world troubleshooting, this limitation means many power-related issues—such as high-frequency switching noise or transient spikes—remain invisible, leading to incomplete diagnosis. Only time-domain visualization tools like oscilloscopes reveal the full behavior of a power rail.
Fact 2: Proper Oscilloscope Setup Is Critical for Accurate Ripple Measurement Accurate ripple measurement requires AC coupling to block the large DC offset, combined with short ground leads (ideally using a ground spring or bayonet tip) and appropriate vertical sensitivity (often 5–20 mV/div). Industry best practices emphasize minimizing probe loop area to avoid picking up external electromagnetic interference, ensuring the displayed waveform reflects true supply behavior rather than measurement artifacts.
Fact 3: Modern Benchtop Oscilloscopes Deliver Strong Performance for Ripple Testing Entry-to-mid-range digital oscilloscopes with ≥100 MHz bandwidth and ≥1 GSa/s sampling rates offer excellent capability for both low-frequency ripple and high-frequency noise analysis. Models in this class enable clear visualization of ripple on multiple power rails simultaneously, supporting efficient debugging in mixed-signal and microcontroller projects.
Step 1: Setup Your Oscilloscope
Step 2: Configure the Oscilloscope Correctly
Step 3: Trigger and Measure
Pro Tip: For the most accurate ripple measurement, keep probe ground leads as short as possible and use a ground spring (bayonet ground) instead of the alligator clip.
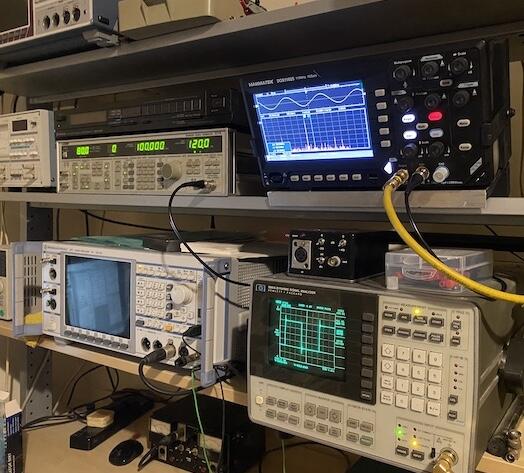
When it comes to accurately measuring power supply ripple, the HANMATEK DOS1104 stands out as a strong performer in the mid-range segment.
Key advantages for ripple testing:
The combination of high sampling rate and solid bandwidth makes the DOS1104 particularly effective at revealing both low-frequency ripple and high-frequency switching noise with excellent clarity.
Measuring power supply ripple is a fundamental skill every serious electronics enthusiast and engineer should master. While a multimeter gives you the DC value, only a good oscilloscope reveals the full picture of your power supply’s health.
For most users seeking a capable 4-channel benchtop oscilloscope with strong ripple measurement performance, the HANMATEK DOS1104 offers an excellent balance of features, accuracy, and value.

Ready to accurately measure ripple and noise on your power supplies?
👉 Buy the HANMATEK DOS1104 – 110MHz 4-Channel Benchtop Oscilloscope
Have you measured ripple on your power supplies before? What was the highest ripple you’ve seen? Share your experience in the comments below!
{"one"=>"Seleccione 2 o 3 artículos para comparar", "other"=>"{{ count }} de 3 artículos seleccionados"}
Seleccione el primer artículo para comparar
Seleccione el segundo artículo para comparar
Seleccione el tercer elemento para comparar


Dejar un comentario