Free Returns Guarantee
Free & Easy Returns
Free & Easy Returns

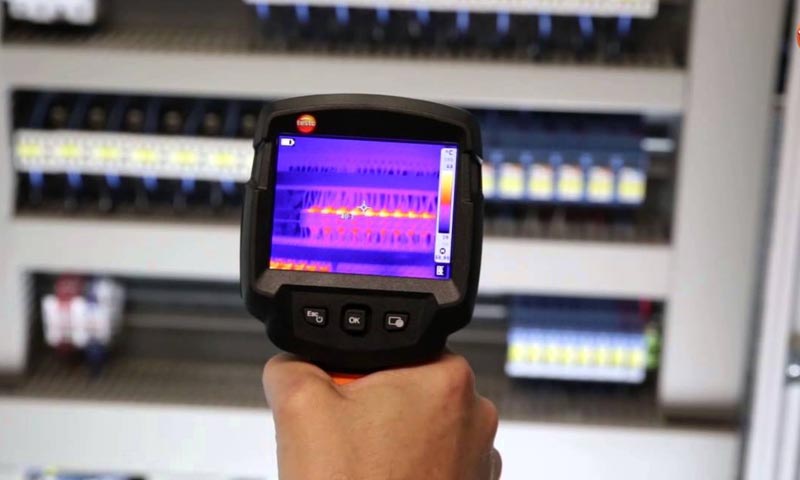
Electrical panels and distribution cabinets are critical components in any building or facility, distributing power safely to circuits and equipment. Over time, issues like loose connections, overloads, or corrosion can generate excessive heat, leading to failures, fires, or costly downtime. Thermal imaging electrical inspection using a thermal camera for electrical panel allows technicians to detect these problems early without powering down systems or using invasive methods.
Traditional inspection methods—such as visual checks, multimeter testing, or feeling for heat by hand—are limited. They often miss hidden or intermittent issues, require close contact (risking shock), and can't quantify temperature differences accurately. Infrared thermography provides a non-contact, real-time view of heat patterns, making it the preferred method for preventive maintenance in industrial, commercial, and residential settings.


Thermal imaging, or infrared thermography, detects infrared radiation emitted by objects based on their temperature. Every object above absolute zero emits thermal energy, and a thermal camera converts this into a visible color-coded image (thermogram), where hotter areas appear in warmer colors (red, yellow, white) and cooler areas in blues and purples.
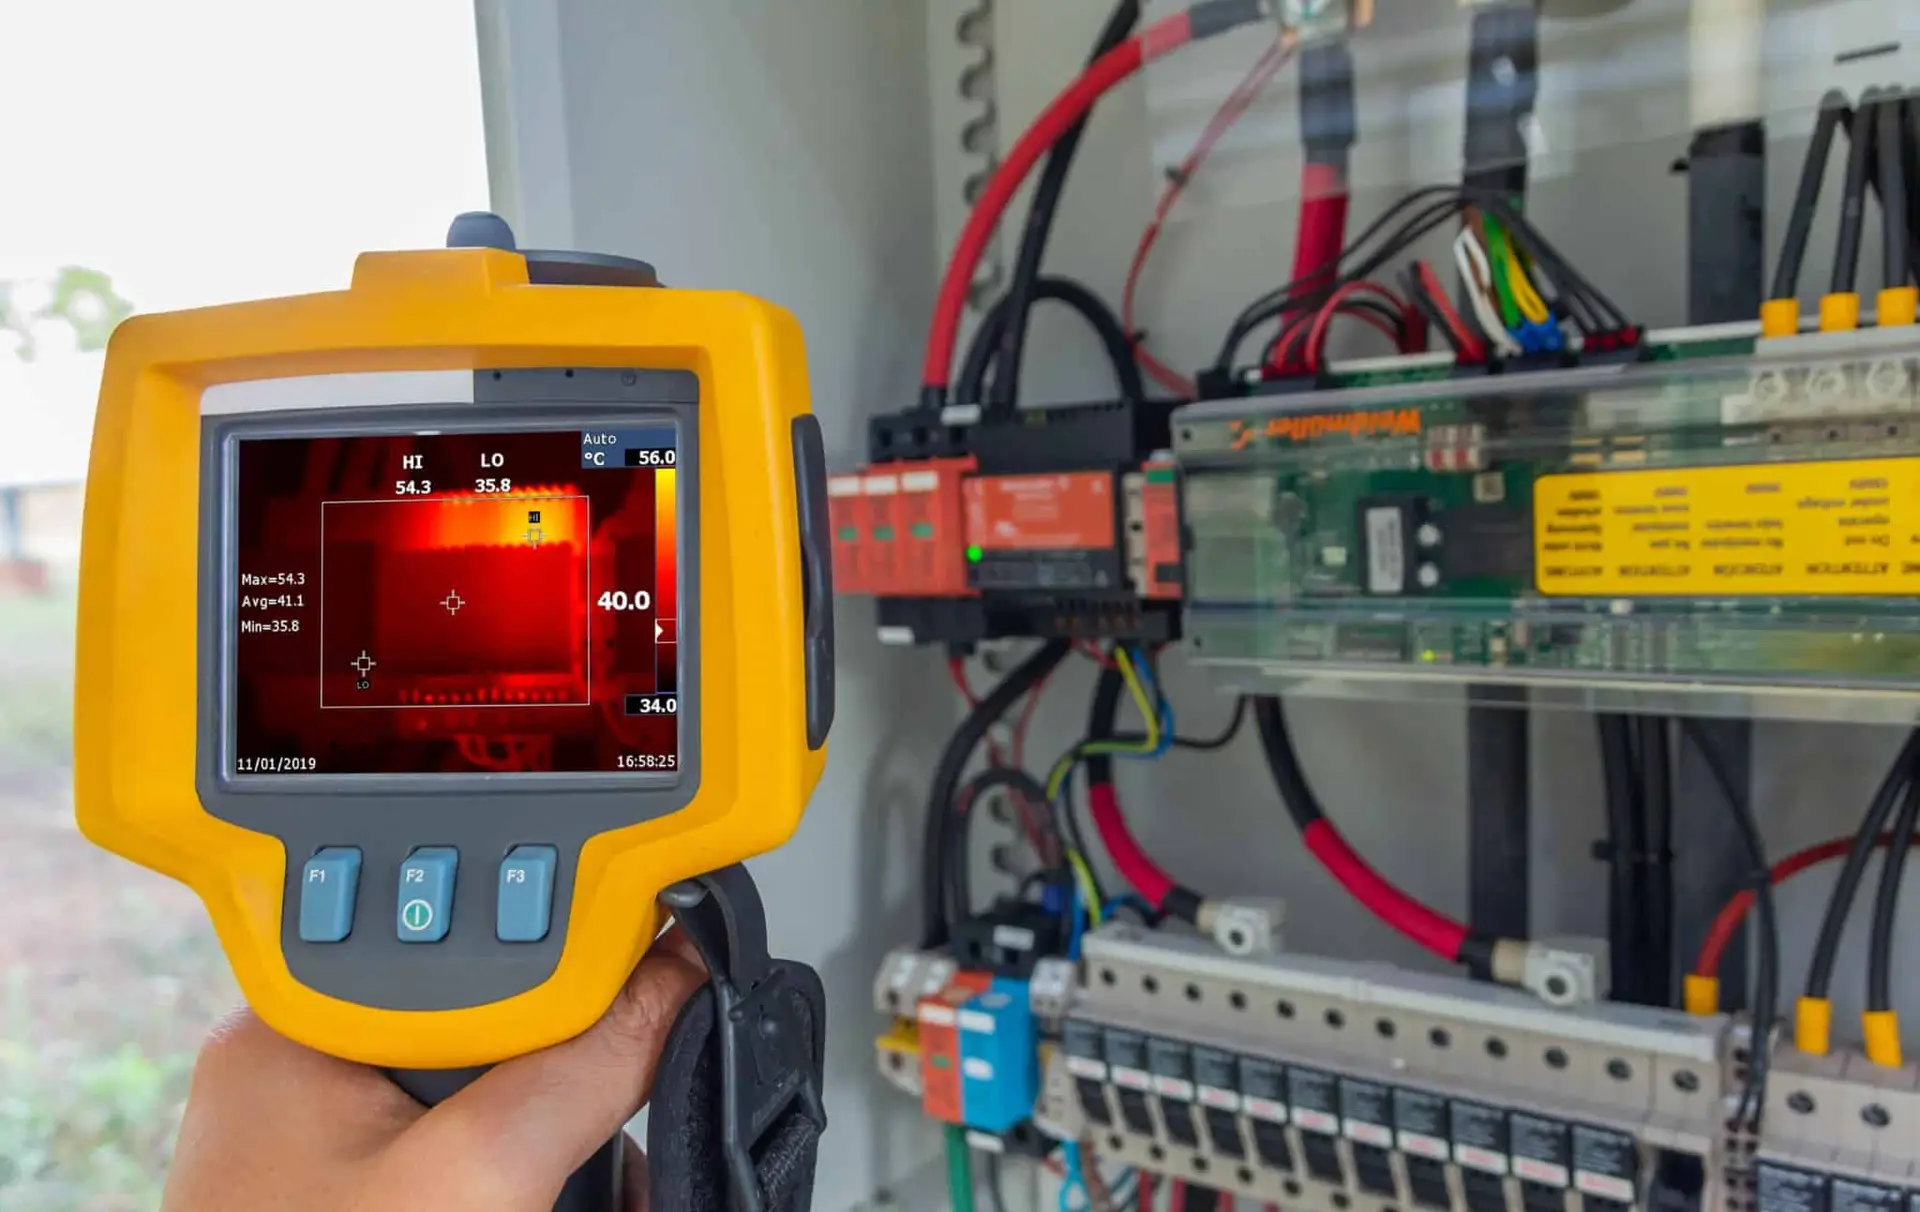
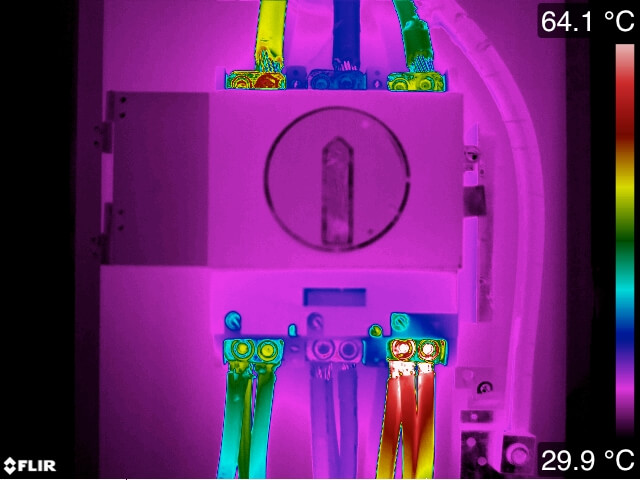
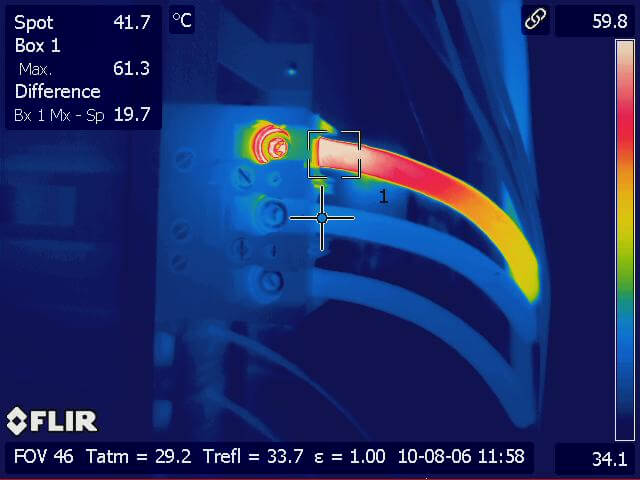
The key is identifying abnormal temperature differences (ΔT) compared to surrounding components under similar load. A hotspot of 10–20°C or more above normal often indicates a problem. Modern cameras also offer spot measurements, area analysis, and image blending with visible light for easier interpretation.
Step 1: Safety Preparation Ensure the system is under normal operating load (at least 40% recommended for meaningful results). Wear appropriate PPE, follow lockout/tagout if needed, and obtain permissions. Never open live panels without proper training and arc-flash protection.
Step 2: Scan the Panel Stand at a safe distance and systematically scan the entire panel, including breakers, busbars, connections, cables, and terminations. Move slowly to allow the camera to stabilize and capture accurate readings.
Step 3: Identify Hotspots Look for anomalies: bright hotspots on connections, breakers, or wires. Compare temperatures to reference points (e.g., similar breakers). Use the camera's analysis tools to measure exact ΔT.
Step 4: Record and Report Capture images with annotations, note ambient conditions, load percentages, and findings. Generate reports for follow-up repairs and compliance documentation.
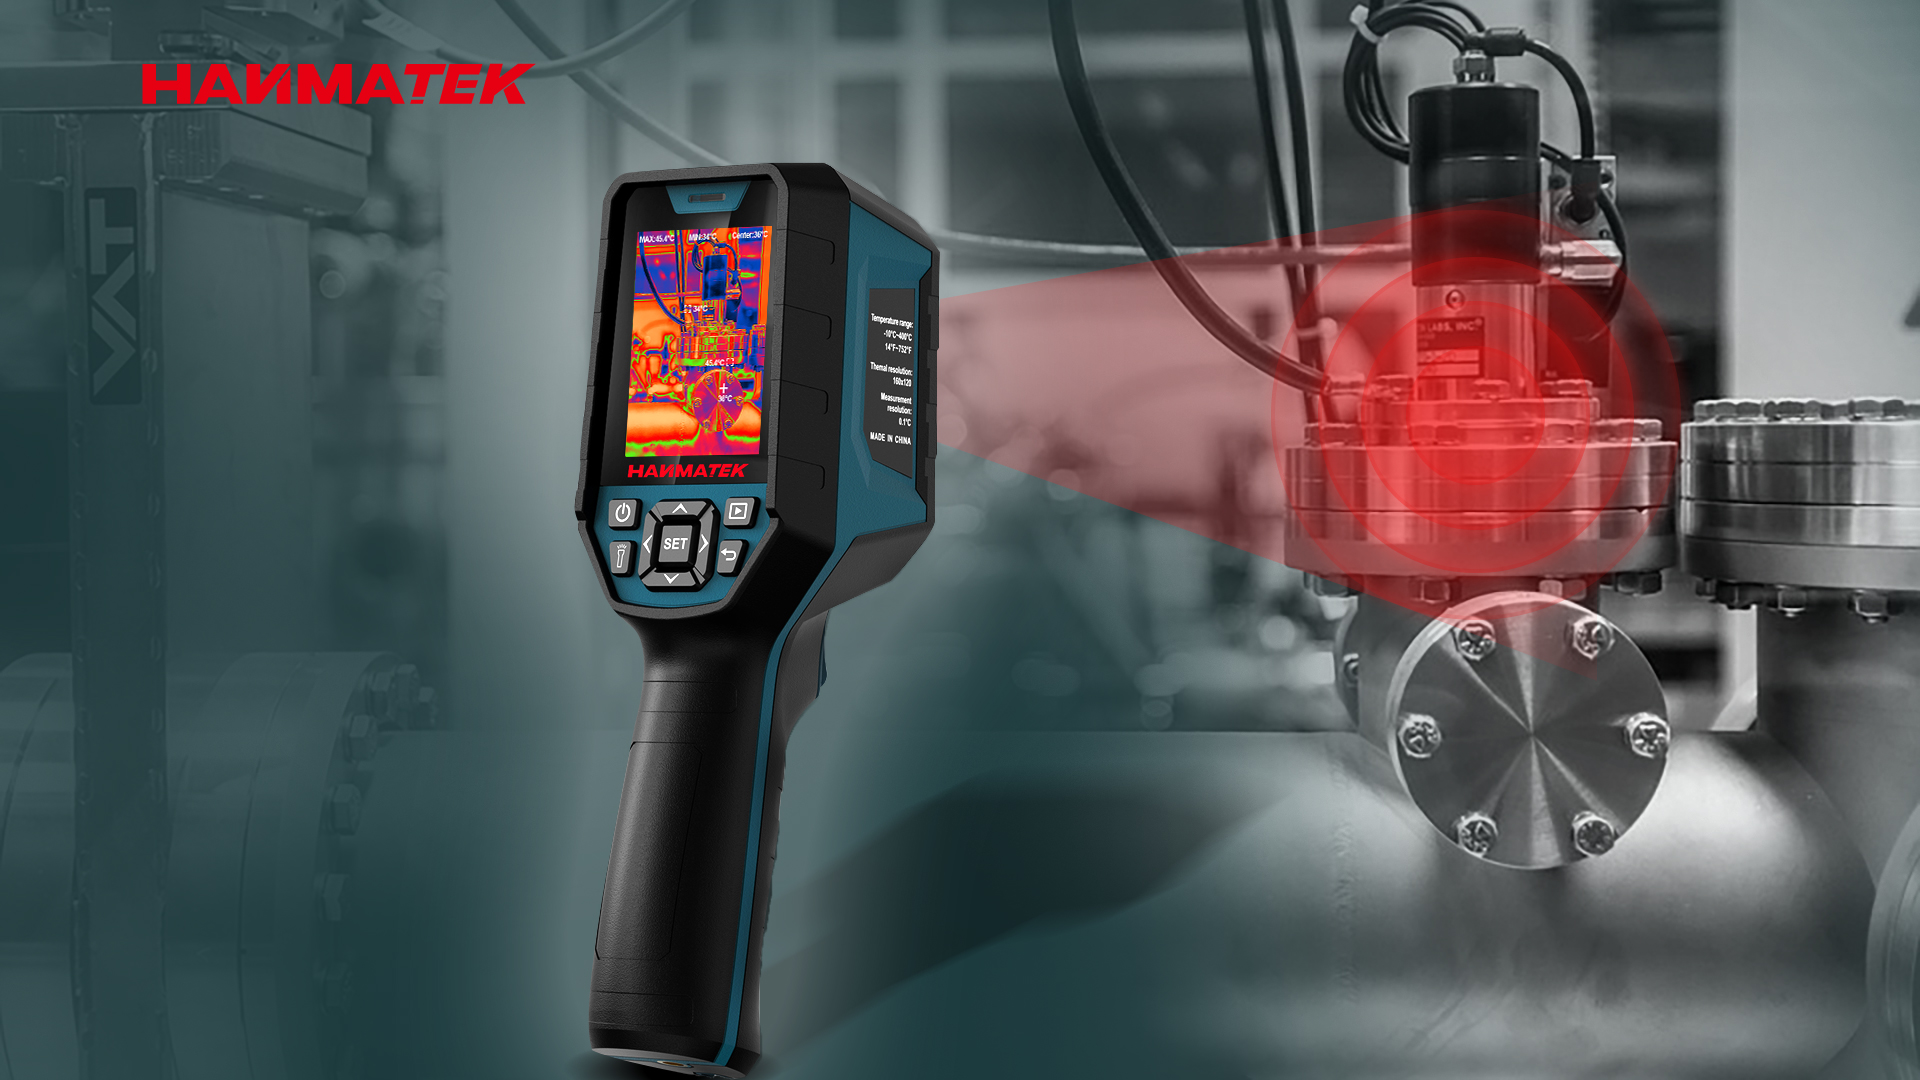
Hanmatek Ti240 With 240×240 pixel resolution, wide temperature range (-20°C to 400°C), and high thermal sensitivity, the Ti240 is well-suited for industrial and professional thermal imaging electrical inspection. Its clear imaging, multiple color palettes, and user-friendly design make it excellent for detailed panel scans and other electrical diagnostics. Ideal for technicians needing reliable performance at a competitive price.
Learn more and purchase: Hanmatek TI240 Thermal Camera
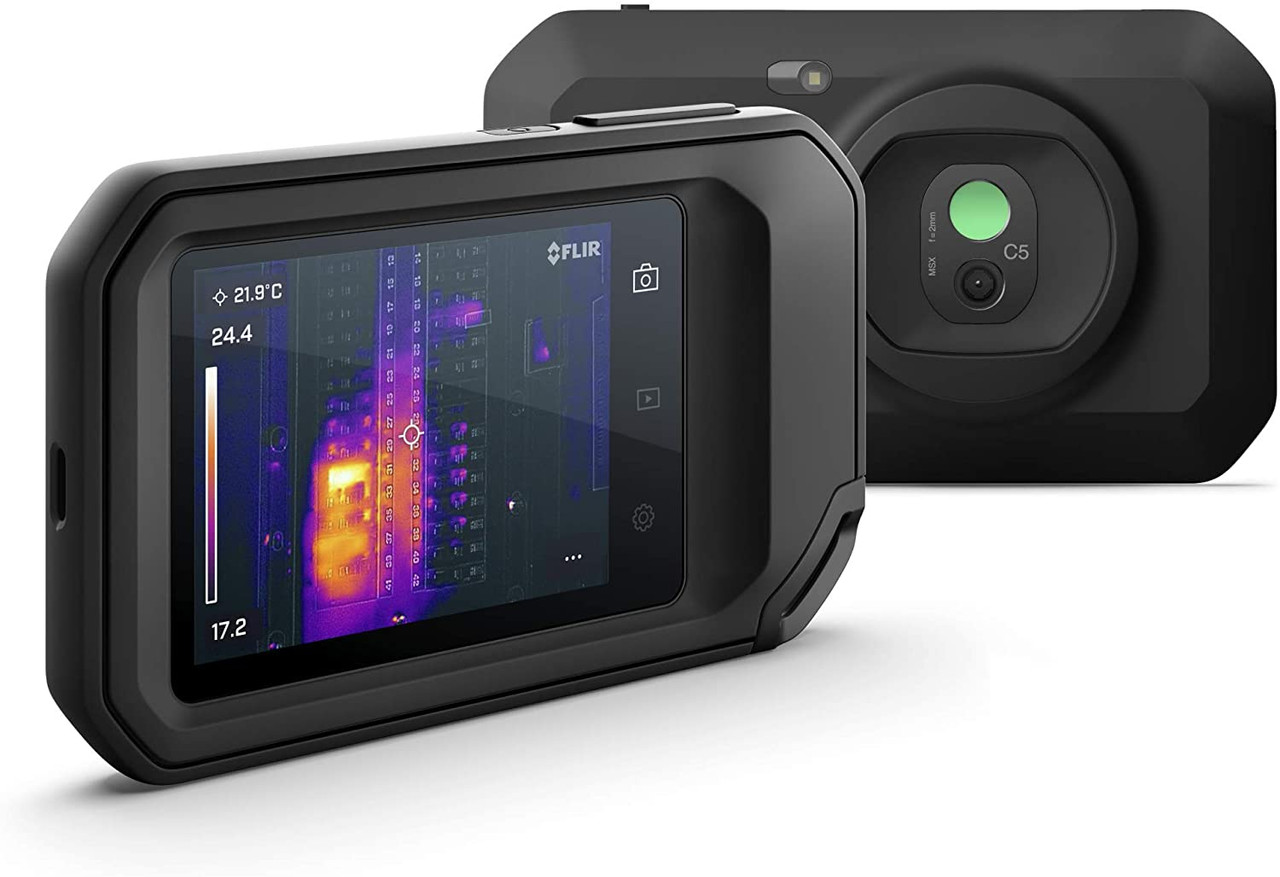
FLIR C5 This compact, rugged pocket-sized camera features 160×120 resolution, MSX image enhancement (blends thermal and visible details), Wi-Fi connectivity for instant sharing, and cloud integration. It's highly portable and great for quick inspections in tight spaces or on the go.
Thermal imaging electrical inspection with a quality thermal camera for electrical panel is one of the most effective ways to ensure electrical system reliability and safety. By visualizing heat signatures, technicians can proactively address faults that traditional methods overlook. For professionals seeking sharp, accurate imaging without excessive cost, the Hanmatek Ti240 stands out as a powerful, versatile choice for electrical diagnostics and beyond. Regular thermal scans should be part of every maintenance program to keep panels—and facilities—running safely and efficiently.
{"one"=>"Select 2 or 3 items to compare", "other"=>"{{ count }} of 3 items selected"}


Leave a comment