Kostenlose Rückgabegarantie
Free & Easy Returns
Free & Easy Returns

Learning how to use an oscilloscope can feel overwhelming for beginners. Many users buy a digital oscilloscope but struggle to get stable waveforms or understand trigger settings. The good news is that waveform measurement is much easier once you understand the basics.
This beginner oscilloscope tutorial is designed for:
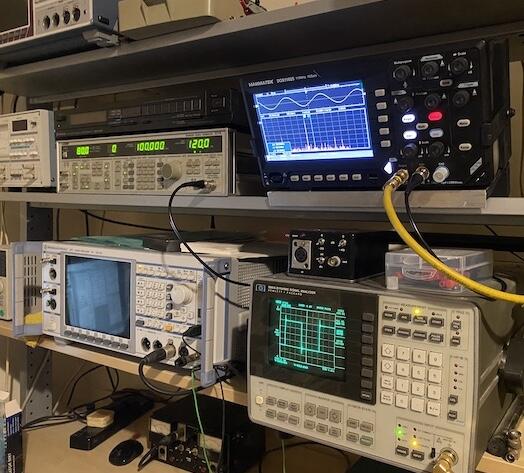
In this guide, we’ll use the Hanmatek DOS1102 oscilloscope as the main example because it offers beginner-friendly controls, dual-channel waveform analysis, and 110MHz bandwidth suitable for most electronics projects.
👉 View Hanmatek DOS1102 Specifications
An oscilloscope is a test instrument used to display electrical signals as waveforms over time. Unlike a multimeter, which only shows average voltage values, an oscilloscope lets you see how signals actually behave.
With a Hanmatek oscilloscope, you can:
A multimeter and oscilloscope serve different purposes.
| Function | Multimeter | Oscilloscope |
|---|---|---|
| Measure Voltage | √ | √ |
| View Waveforms | × | √ |
| High Frequency Detection | × | √ |
| PWM Analysis | × | √ |
| Signal Timing Analysis | × | √ |
Not completely. However, some Hanmatek oscilloscope models include integrated multimeter functions, making them useful all-in-one tools for electronics work.
👉 Product Link: https://hanmatek.com/collections/oscilloscope/products/hanmatek-dos1102-110mhz-2ch-oscilloscope
The Hanmatek DOS1102 package typically includes:

Correct probe installation is critical for accurate waveform measurements.
For most signal measurements, 10X mode is recommended because it reduces circuit loading and improves high-frequency performance.
Probe calibration (or probe compensation) is the process of matching the oscilloscope probe to the input channel so that signals are displayed accurately. Most passive probes have an adjustable compensation capacitor that must be tuned to the oscilloscope’s input capacitance.
To calibrate, you typically connect the probe to the oscilloscope’s built-in square wave calibration output. Then, using a small adjustment tool, you turn the compensation screw on the probe until the displayed square wave looks clean and flat on the top and bottom—without overshoot (peaks) or rounding.
Proper calibration ensures that fast signal edges are not distorted, which is critical for accurate amplitude and timing measurements, especially in digital and switching circuits.
Correct calibration helps:
How to calibrate an oscilloscope probe?
Connect the probe to the calibration terminal and adjust the compensation capacitor until the square wave becomes a clean rectangular waveform.
The Hanmatek DOS1102 uses a beginner-friendly interface that makes waveform measurement easier.
Shows voltage changes over time.
Used for:
Adjust waveform horizontal scale.
Stabilize the waveform display.

The Hanmatek DOS1102 is a dual-channel oscilloscope, allowing simultaneous measurement of two signals.
Dual-channel analysis helps compare:
Adjust volts/div according to signal amplitude.
Ensure the oscilloscope matches the probe setting.
Triggering is a key oscilloscope function that stabilizes repetitive waveforms on the screen. Without proper triggering, the signal would appear to drift or roll, making it hard to analyze.
The basic idea is that the oscilloscope waits for a specific condition in the signal—such as a rising edge crossing a set voltage level—before it starts drawing the waveform. This creates a stable, repeatable display.
Common trigger types include edge triggering (most widely used), pulse width triggering, and slope triggering. For beginners, edge trigger is usually enough: you set the trigger source, choose rising or falling edge, and adjust the trigger level until the waveform locks into place.
Good triggering makes measurements like frequency, amplitude, and timing much more reliable and easier to interpret.
Triggering controls when the oscilloscope starts drawing a waveform. Instead of capturing signals at random points in time, the scope waits for a specific event—like the signal crossing a chosen voltage level on a rising or falling edge.
By synchronizing each sweep to the same point in the waveform, triggering makes repetitive signals appear stable and aligned on the screen. This is why a properly triggered signal looks “locked” instead of sliding or rolling.
If the waveform is unstable or jumping, it usually means the trigger level, source, or mode is not set correctly, or the signal itself is not repetitive enough for stable triggering.
The oscilloscope continuously updates the display even if no valid trigger condition is met. This is useful when you are first probing a signal and are not yet sure about its timing or stability.
The display updates only when the signal meets the defined trigger condition. If no trigger occurs, the waveform stays frozen. This mode is better for observing stable, repeating signals.
Captures and holds one waveform event when the trigger condition is met. It is especially useful for detecting rare or one-time events like glitches, spikes, or startup behavior.
The most commonly used trigger mode. It activates when the signal crosses a set voltage threshold.
You can trigger on:
This transition helps users visually understand how triggering stabilizes the display and makes measurements meaningful.
PWM (Pulse Width Modulation) controls power delivery by rapidly switching signals on and off.
PWM is widely used in:
Important PWM parameters include:
Adjust the horizontal scale until several PWM cycles appear.
Use:
Measure:
To measure PWM signals accurately, adjust the time base and use edge triggering to stabilize the waveform and display duty cycle changes clearly.
FFT converts waveforms into frequency-domain information.
Some Hanmatek oscilloscopes support serial bus analysis.
Arduino UART communication decoding.
Possible causes:
Solutions:
Check:
👉 Product Link: https://hanmatek.com/collections/oscilloscope/products/hanmatek-dos1102-110mhz-2ch-oscilloscope
The Hanmatek DOS1102 combines beginner-friendly controls with powerful debugging capabilities.
👉 Check Latest DOS1102 Pricing
Sampling rate is equally important.
Dual-channel oscilloscopes are far more useful for debugging.
Reliability and support matter for long-term use.
The fastest way to learn oscilloscope operation is through practical projects.
Recommended learning path:
The Hanmatek DOS1102 is an excellent beginner oscilloscope because it combines affordability, dual-channel analysis, and professional measurement features in a user-friendly package.
{"one"=>"Wählen Sie 2 oder 3 Artikel zum Vergleichen aus", "other"=>"{{ count }} von 3 Elementen ausgewählt"}
Wählen Sie das erste zu vergleichende Element aus
Wählen Sie das zweite zu vergleichende Element aus
Wählen Sie das dritte Element zum Vergleichen aus


Einen Kommentar hinterlassen