Free Returns Guarantee


How can Hanmatek DOS1102 help beginners?

You will find the Hanmatek DOS1102 designed with beginners in mind. Its simple interface, easy setup, and clear display help you approach oscilloscope measurements with confidence. The included probes and USB power option make your first experience straightforward. For extra guidance, consult the user manual for detailed support.
Key Takeaways
- The Hanmatek DOS1102 features a user-friendly interface, making it easy for beginners to navigate and control measurements.
- A bright, clear display allows you to analyze waveforms without straining your eyes, enhancing your learning experience.
- Dual-channel capability enables simultaneous measurement of two signals, which is essential for troubleshooting and understanding electronics.
Features for Beginners

Simple Interface
You will appreciate the straightforward design of the Hanmatek DOS1102. The front panel groups all essential controls logically, so you can quickly locate each function. The menu system uses clear labels and icons, which helps you navigate without confusion. You will find that the buttons and knobs respond smoothly, giving you precise control over your measurements.
- Many users describe the Hanmatek DOS1102 interface as user-friendly.
- Some beginners notice a learning curve, especially when comparing it to other entry-level oscilloscopes.
- Models like the Rigol DS1202Z-E often receive praise for their intuitive layouts, which may feel easier for absolute beginners.
Despite this, you can master the Hanmatek DOS1102 with a bit of practice. The included user manual provides step-by-step instructions, so you always have guidance at your fingertips.
Tip: Spend a few minutes exploring each button and menu. Familiarity with the interface will boost your confidence and speed up your workflow.
Clear Display
The Hanmatek DOS1102 features a bright, crisp screen that makes signal analysis less stressful. You can view waveforms and measurements clearly, even in well-lit environments. The display resolution matches that of leading models in its class, so you do not sacrifice clarity for affordability.
| Model | Resolution |
|---|---|
| Hanmatek DOS1102 | 800x480 |
| Rigol DS1054Z | 800x480 |
You will notice that the 800x480 resolution provides enough detail for most beginner projects. The screen size and brightness help you distinguish between multiple signals and read measurement values without straining your eyes.
Two Channels
You can measure and compare two signals at the same time with the Hanmatek DOS1102. This dual-channel feature allows you to analyze input and output signals side by side, which is essential for troubleshooting circuits or learning about signal relationships.
The oscilloscope offers a 100 MHz bandwidth, which covers a wide range of beginner and intermediate electronics projects. You also receive passive probes in the box, so you can start measuring right away.
| Specification | Value |
|---|---|
| Bandwidth | 100 MHz |
| Price | Under $200 |
You will find that this combination of features—two channels, high bandwidth, and included probes—makes the Hanmatek DOS1102 a practical choice for students and hobbyists. The affordable price point ensures you get professional-grade capabilities without a steep investment.
Note: Always connect both probes before starting a dual-channel measurement. This habit helps you avoid errors and ensures accurate results.
Hanmatek DOS1102 Setup
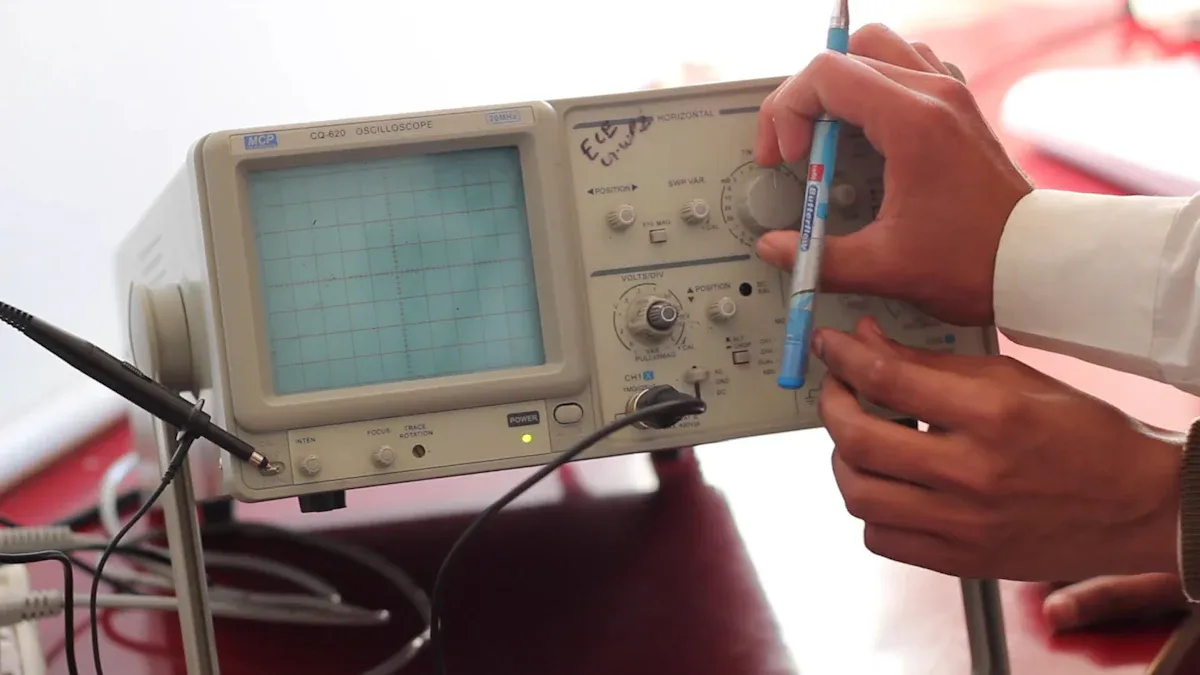
Connecting Probes
You start by unboxing your Hanmatek DOS1102 and locating the included passive probes. Each probe comes with a BNC connector that attaches securely to the oscilloscope’s input channels. To connect a probe, align the BNC connector with the channel input and twist it until it locks in place. You should connect both probes if you plan to measure two signals at once.
After connecting the probes, attach the probe tip to your test point and connect the ground clip to a suitable ground on your circuit. This step ensures accurate signal readings and reduces noise. Always check that the probe’s attenuation switch matches the oscilloscope’s settings. Most probes offer a 1x/10x switch. Set it to 10x for most measurements, then select 10x in the oscilloscope’s channel menu.
Tip: Double-check your probe connections before powering on the device. Loose connections can lead to inaccurate readings or signal loss.
USB Power
You can power the Hanmatek DOS1102 directly from a USB connection. This feature gives you flexibility, especially if you do not have access to a traditional wall outlet. The USB power option makes the oscilloscope highly portable. You can use it in classrooms, labs, or even on the go.
- You do not need a bulky power adapter.
- You can connect the oscilloscope to a laptop, power bank, or desktop USB port.
- The lightweight design and large screen make it easy to carry and set up anywhere.
This convenience helps beginners focus on learning measurements rather than worrying about power sources. You gain the freedom to experiment in different environments without extra equipment.
Probe Calibration
Proper probe calibration ensures accurate measurements. You should calibrate each probe before starting your experiments. The Hanmatek DOS1102 provides a dedicated calibration terminal on the front panel. Follow these steps to calibrate your probes:
- Connect the probe tip to the calibration terminal.
- Attach the ground clip to the nearby ground post.
- Display the calibration signal (usually a 1 kHz square wave) on the screen.
- Use a small screwdriver to adjust the probe’s compensation trimmer until the square wave shows flat tops and bottoms with sharp corners.
| Step | Action |
|---|---|
| 1 | Connect probe to calibration terminal |
| 2 | Attach ground clip |
| 3 | Display calibration signal |
| 4 | Adjust compensation trimmer |
You should repeat this process for each probe. Well-calibrated probes prevent measurement errors and help you trust your results.
Note: Always calibrate your probes after changing the attenuation setting or switching to a new probe.
Basic Operation
Adjusting Scales
You control the vertical and horizontal scales on the Hanmatek DOS1102 to view signals clearly. The vertical scale knob changes the voltage per division, letting you zoom in or out on your waveform. The horizontal scale knob adjusts the time base, so you can stretch or compress the signal along the time axis.
- Turn the VOLTS/DIV knob to set the vertical scale for each channel.
- Rotate the SEC/DIV knob to change the time scale.
Tip: Start with a larger scale, then fine-tune for the best view of your signal.
Using Trigger Settings
You use the trigger function to stabilize your waveform. The trigger tells the oscilloscope when to start drawing the signal, so you see a steady display instead of a rolling or jumping trace.
- Press the TRIGGER MENU button to access trigger options.
- Select the trigger source (Channel 1 or Channel 2).
- Adjust the trigger level knob to set the voltage point where the oscilloscope triggers.
A stable trigger helps you analyze repeating signals and capture important events.
Navigating Controls
You interact with the Hanmatek DOS1102 using dedicated buttons and knobs. The front panel groups controls by function, so you find what you need quickly.
- Use the MENU buttons to access measurement tools and settings.
- Press the AUTO button for automatic setup if you feel unsure.
- Use the CURSOR buttons to measure time and voltage differences.
Note: Practice using each control. Familiarity with the panel boosts your efficiency and confidence.
Measurements and Examples
Voltage Measurement
You can measure voltage with precision using the Hanmatek DOS1102. Connect your probe to the test point and observe the waveform on the display. Adjust the vertical scale to match the expected voltage range. The oscilloscope provides DC gain accuracy within ±3%, which ensures reliable readings for most beginner projects.
- Set the probe attenuation to 10x for typical measurements.
- Use the cursor function to pinpoint voltage levels.
- Read the peak-to-peak and average voltage directly from the measurement menu.
Tip: Always verify your probe calibration before taking voltage measurements. This step helps you avoid errors and ensures consistent results.
Frequency Measurement
You can analyze signal frequency with confidence. The Hanmatek DOS1102 offers 110 MHz bandwidth and two channels, allowing you to capture and compare signals up to 110 MHz. The intuitive buttons and menus simplify the process, making frequency measurement accessible even if you are new to oscilloscopes.
| Feature | Hanmatek DOS1102 | Rigol DS1054Z |
|---|---|---|
| Bandwidth | 110 MHz | 50 MHz |
| Sampling Rate | 1 GSa/s | 1 GSa/s |
| Channels | 2 | 4 |
| Advanced Features | No | Yes |
You can select the frequency measurement option from the menu and view the result instantly. The oscilloscope captures signals with nearly 10 data points, providing solid performance for basic electronics tasks.
Circuit Testing
You can troubleshoot simple circuits using the Hanmatek DOS1102. Connect the probes to input and output points to compare waveforms. Look for expected signal shapes and timing. If you notice distortion or unexpected values, use the trigger and scale controls to isolate the issue.
- Test power supply rails for correct voltage.
- Check clock signals for stable frequency.
- Compare input and output signals in amplifiers or logic gates.
Note: Circuit testing with an oscilloscope helps you identify faults quickly and build your troubleshooting skills.
Troubleshooting and Support
Common Mistakes
You may encounter a few common mistakes when using the Hanmatek DOS1102. Recognizing these issues early helps you avoid frustration and improves your measurement accuracy.
- Incorrect Probe Attenuation: You might forget to match the probe's attenuation switch with the oscilloscope settings. Always check both before starting.
- Loose Connections: You may notice unstable signals if the probe or ground clip is not secure. Double-check all connections before measuring.
- Improper Calibration: You should calibrate your probes every time you change settings or switch probes. Skipping this step can lead to distorted waveforms.
Tip: If your waveform looks strange, review your probe setup and calibration first. Most signal issues start here.
User Manual
You gain valuable support from the Hanmatek DOS1102 user manual. The manual provides step-by-step instructions for setup, calibration, and troubleshooting. You can find detailed diagrams and explanations for each function. If you face an unfamiliar error, consult the troubleshooting section for solutions.
| Resource | Description |
|---|---|
| User Manual PDF | Setup, calibration, troubleshooting |
| Quick Start Card | Basic operation guide |
Note: Keep your manual nearby during experiments. Quick reference saves time and prevents mistakes.
Product Links
You can access official resources and support for the Hanmatek DOS1102 online. These links help you find firmware updates, replacement probes, and technical assistance.
You stay informed and resolve issues faster by using these resources. For further learning, explore community forums and video tutorials linked on the product page.
You gain confidence in electronics when you use the Hanmatek DOS1102. The simple interface, easy setup, and practical support help you master oscilloscope basics.
- Explore new projects with reliable measurements.
- Access manuals and online resources for continued learning.
Start your journey with Hanmatek DOS1102 and build your skills step by step.
Dejar un comentario